

One of man’s greatest achievements was the moment we discovered fire. Fire gave us the ability to gather and stay warm, but it also provided the ability to add flavor and texture to meals. To this day, a quality steak cooked over the fire in a steakhouse is considered the holy grail meal for many people.
WHAT YOU'LL LOVE
- This page teaches the two setups that unlock the pellet grill's most underused capability — direct-flame searing: Most pellet grill owners use them exclusively in indirect convection mode. The VDD damper, diffuser removal, and either GrillGrates or the cast iron griddle convert the YS640s into a direct-flame cooking surface that produces steak results no indirect pellet cook can match.
- GrillGrates and the cast iron griddle produce fundamentally different crust characters: GrillGrate raised rails concentrate heat at contact points, producing the deep crosshatch grill marks and slightly crispy contact-seared lines with softer zones between them. The flat cast iron griddle produces an all-over even crust with no marks — the Maillard browning covers the entire surface rather than concentrating at rail contact points. Both are excellent and serve different aesthetic and textural preferences.
- The two-zone setup — hot left side over the firebox, cooler right side — solves the biggest direct-fire steak problem: A steak that's achieved the right color but not the right temperature can be moved to the right side to finish cooking gently, out of the direct flame. This two-zone approach is the difference between a properly cooked steak and one that's either charred on the outside but raw inside, or fully cooked but burnt on the exterior.
- Moving the steak to a new spot after each flip produces better results than flipping in place: The directions note this explicitly — the steak cools the cooking surface beneath it. Moving to a fresh, hotter section of the GrillGrate or griddle after each flip ensures every contact is with maximum-temperature metal, producing more consistent searing across all four sides rather than progressively diminishing sear intensity.
How to Grill a Steak on a Pellet Grill
Tom Jackson
Rated 5.0 stars by 1 users
Category
Beef
Cuisine
American
Servings
1
Prep Time
15 minutes
Cook Time
10 minutes
Calories
1070
Chef Tom fires up the Yoder Smokers Pellet Grills and shares some Tips & Techniques on How to Grill a Steak on a Pellet Grill.
Ingredients
-
Creekstone Farms Prime Strip Steaks
-
Cornhusker Kitchen Spray Duck Fat
-
Cattleman’s Grill Road House Steak & Beef Rub
Directions
GrillGrate Method
Preheat your Yoder Smokers YS640s Pellet Grill to 450ºF set up for direct grilling (diffuser door or entire plate removed) and GrillGrate grilling panels installed on the left side of the grill, directly over the fire box. Slide the damper all the way in to create a hot side (left) and cooler side (right).
Apply the spray duck fat to the surface of the steak to act as a binder for the rub to attach to the meat. Season with Cattleman’s Grill Road House Steak & Beef Rub.
Place the steak on the grill grates at a 45º angel to the raised ridges of the GrillGrates. Close the lid and cook until dark grill marks are formed, about X minutes.
Flip the steak and place it in a slightly different location on the GrillGrates, still over direct flame. *Your steak cools the grates as it cooks, so moving it to a slightly different location provides a new hot spot for better grill marks. Close the lid and cook until dark grill marks are formed, about X minutes.
Flip the steak again, this time rotating it to form diamond shaped crosshatch marks. Leave the door open at this time. Cook until grill marks are formed.
Flip again and once again position the steak to form the crosshatch grill marks.
Check the internal temperature of the steak by placing the probe of a digital thermometer in the dead center of the steak. The target temperature for a medium-rare steak is about 125ºF. If you are getting close to that temperature, leave the door of the grill open to finish the cook. If you’re still below 100ºF, close the lid so that the internal temperature can rise quicker.
If your steak has all of the char and color that you want, but you still have not reached your desired internal temperature, then move the steak to the right side of the grill, in the cooler spot, and close the lid until reaching your temperature.
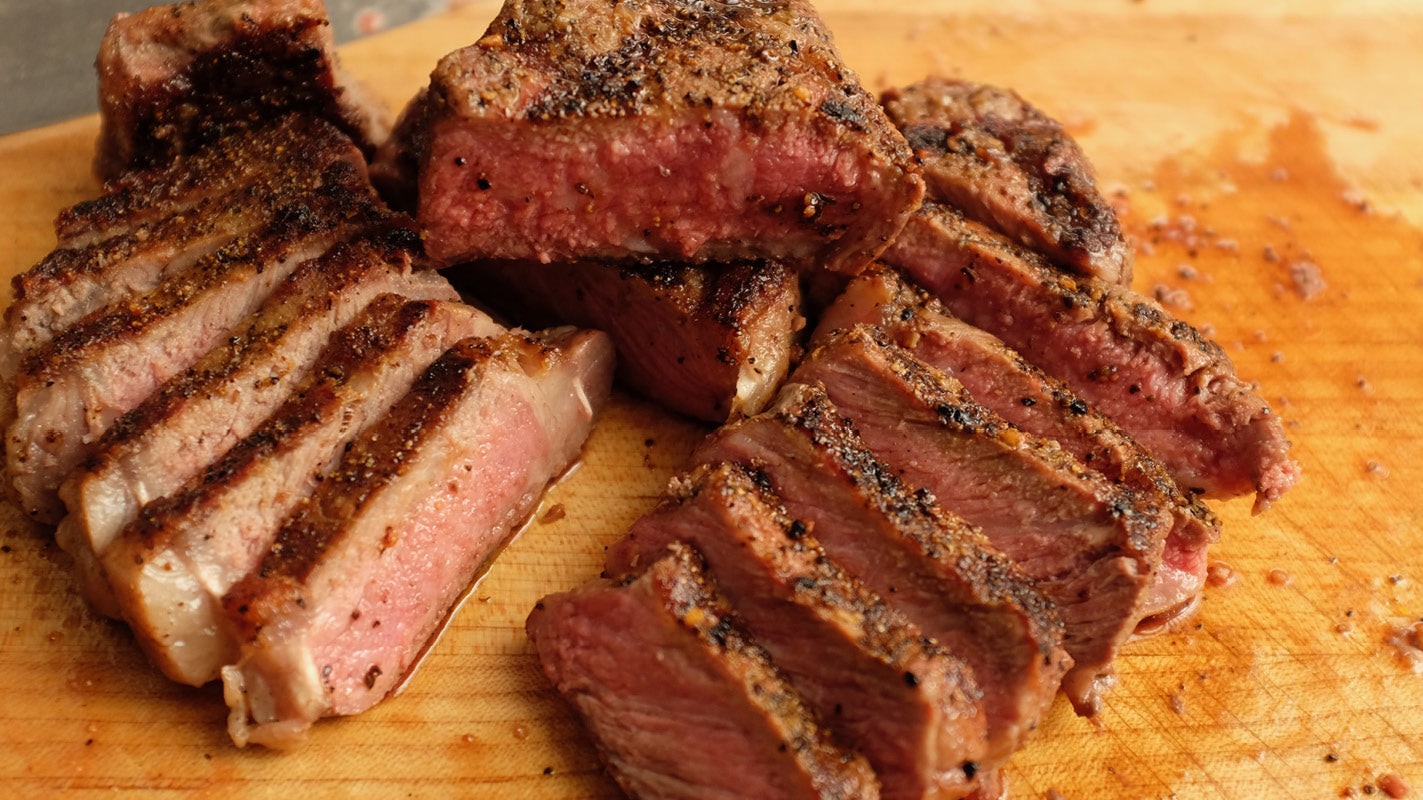
Remove the steak from the grill and let rest for 3-5 minutes before slicing.
Cast Iron Griddle Method:
Preheat your Yoder Smokers YS480s Pellet Grill to 450ºF set up for direct grilling (entire diffuser plate removed) and a Yoder Smokers Reversible Cast Iron Griddle installed on the left side of the grill (directly over the fire box), smooth side of the griddle up. Slide the damper all the way in to create a hot side (left) and cooler side (right).
Apply the spray duck fat to the surface of the steak to act as a binder for the rub to attach to the meat. Load a spice grinder with Cattleman’s Grill Road House Steak & Beef Rub and set to a finer consistency. Grind the rub onto the surface of the steak. When searing on a flat surface, larger particles of the rub may scorch when cooking, so break the rub down finer first, or choose a different rub with a finer texture.
Place a little avocado (or other high heat vegetable oil) on the center of the griddle. Place the steak on the oil. Close the lid and cook until a dark golden brown sear is formed, about 7 minutes.
Flip the steak and place it in a slightly different location on the griddle. *Your steak cools the griddle slightly as it cooks, so moving it to a different location provides a new hot spot for a better sear. Close the lid and cook until an instant read thermometer inserted into the center of the steak reaches your desired finishing temperature. The target temperature for a medium-rare steak is about 125ºF. If you are getting close to that temperature, leave the door of the grill open to finish the cook. If you’re still below 100ºF, close the lid so that the internal temperature can rise quicker.
If your steak has all of the sear and color that you want, but you still have not reached your desired internal temperature, then move the steak to the right side of the grill, in the cooler spot, and close the lid until reaching your temperature.
Remove the steak from the grill and let rest for 3-5 minutes before slicing.
Recipe Note
Recipe FAQ
What is the difference between the GrillGrate method and the cast iron griddle method?
GrillGrate panels concentrate heat at the raised rails, producing the deep crosshatch grill marks that characterize classic steakhouse presentation. The zones between the rails receive slightly less direct heat, producing a mix of seared and less-seared surface areas. The cast iron griddle creates full-surface contact between the steak and the cooking surface — the result is an all-over even brown crust with no marks, similar to a restaurant pan-sear. Both produce excellent steaks; the choice is aesthetic and textural preference.
How do I set up the YS640s for direct-flame grilling?
For the GrillGrate method: remove the diffuser access door (or the entire diffuser plate) from the left side of the grill and install GrillGrate panels directly over the firebox opening. For the cast iron griddle method: remove the entire diffuser plate and install the Yoder Smokers Cast Iron Griddle on the left side over the firebox. In both cases, slide the Variable Displacement Dampener (VDD) all the way in to concentrate airflow and heat on the left side, creating a hot zone left and a cooler zone right. Set grill temperature to 450°F.
What internal temperature should I target?
For medium-rare, the target is approximately 125°F internal temperature pulled from the grill, which will carry over to 130–132°F during the 3–5 minute rest. The directions specify using a digital thermometer inserted into the dead center of the steak — not the thinnest edge and not near the bone. At 450°F over direct flame, a 1-inch strip steak typically reaches this temperature in approximately 8–12 minutes total cook time depending on thickness and starting temperature.
Why grind the rub finer for the cast iron griddle method?
Directions Step 2 of the Cast Iron Griddle Method specifies grinding the Road House rub to a finer consistency before applying to the steak. Coarser rub particles placed directly on a flat cast iron surface at 450°F will scorch before the meat beneath them has fully seared — large particles of sugar and spice burn faster than the meat surface browns. Grinding finer reduces the particle size so the rub and meat surface brown at similar rates. On GrillGrates, the raised rails keep the steak surface slightly elevated, so direct rub-to-metal contact is reduced.
Should I leave the grill door open or closed when searing?
It depends on the temperature stage. The directions specify closing the lid during most of the sear to allow heat from above to contribute to cooking; the ambient temperature inside the closed grill accelerates the rise in internal temperature. When the steak is approaching the target temperature (above 100°F internal), leave the lid open — this slows the temperature rise so you have more control over the finish. If the exterior has the color you want but the interior isn't there yet, move to the right (cool) side and close the lid.
Can I make this indoors?
2 out of 5 — Can be done inside, loses key flavor. A preheated cast iron skillet over the highest stovetop heat available produces a good sear, and the all-over crust of the griddle method can be approximated. What you lose is the live-fire character, the pellet smoke that infuses during the cook, and the GrillGrate crosshatch marks. The technique principles — two-zone cooking, moving to a fresh hot spot after each flip, using an instant-read thermometer — all apply indoors.
Recipe Highlights
"About X minutes" in Steps 3 and 4 is a placeholder — the actual time is approximately 2–3 minutes per flip: At 450°F over direct flame on GrillGrates, a 1-inch strip steak develops dark grill marks in approximately 2–3 minutes per flip. Thicker steaks take longer; thinner steaks less. The visual cue is more reliable than a timer: the steak should release cleanly from the grate and show deep, dark brown marks (not just lines) before flipping. If it resists, it's not ready.
Apply duck fat as a binder before the rub — not oil: Directions Step 2 specifies Cornhusker Kitchen Spray Duck Fat specifically as the binder. Duck fat has a higher smoke point than most cooking sprays and adds a subtle richness to the seared crust that neutral oils don't provide. The fat also helps the Road House rub adhere to the steak surface during handling and the initial placement on the grill, rather than falling off on contact with the grate.
The four-flip crosshatch sequence on GrillGrates is specific: Flip 1 creates marks in one direction. Flip 2 places the same side down in a different grill location (fresher hot surface). Flip 3 rotates the steak 45–90° to create the crosshatch on the already-marked side. Flip 4 repeats on the other side. Following this sequence produces the diamond-pattern grill marks; departing from it produces parallel lines on both sides instead.
Rest the steak 3–5 minutes before slicing — not less: Directions Step 9 (GrillGrate) and Step 6 (Cast Iron) both specify this rest. During the rest, the internal temperature rises 5–7°F through carryover cooking — a steak pulled at 125°F will reach 130–132°F at rest, which is the actual serving temperature. Slicing before the rest causes significant juice loss; the juices have not yet redistributed from the center to the edges, so they pool on the cutting board rather than remaining in the meat.
Recommended Recipes
Nutrition
Nutrition
- Nutrition Serving Size
- 1
- per serving
- Calories
- 1070
- Fat
- 60 grams
- Cholesterol
- 326 milligrams
- Sodium
- 740 milligrams
- Carbs
- 2 grams
- Protein
- 120 grams


