

Experience the flavor of smoky, fall-apart tenderness tenderloin with the Kamado Joe Classic III Ceramic Charcoal Grill! With Chef Eric Gephart's you'll be able to make this Quick Roasted Pork Tenderloin right in your own backyard.
WHAT YOU'LL LOVE
- A two-zone fire for sear-then-finish cooking: Banking coals to one side and setting up a deflector on the other lets you sear the tenderloins directly over the coals, then move them to gentler indirect heat to finish without ever changing setups.
- A double rub with a mustard-herb paint on top: Layering steakhouse seasoning under California Tri-Tip seasoning, then coating the tenderloin in a chopped herb-and-mustard paste, builds more complexity than either the rub or the herb paste could deliver alone.
- Re-painting the mustard mixture after the sear: Adding a second coat of the herb-garlic mustard once the tenderloin moves to indirect heat lets that layer set without burning off during the initial high-heat sear.
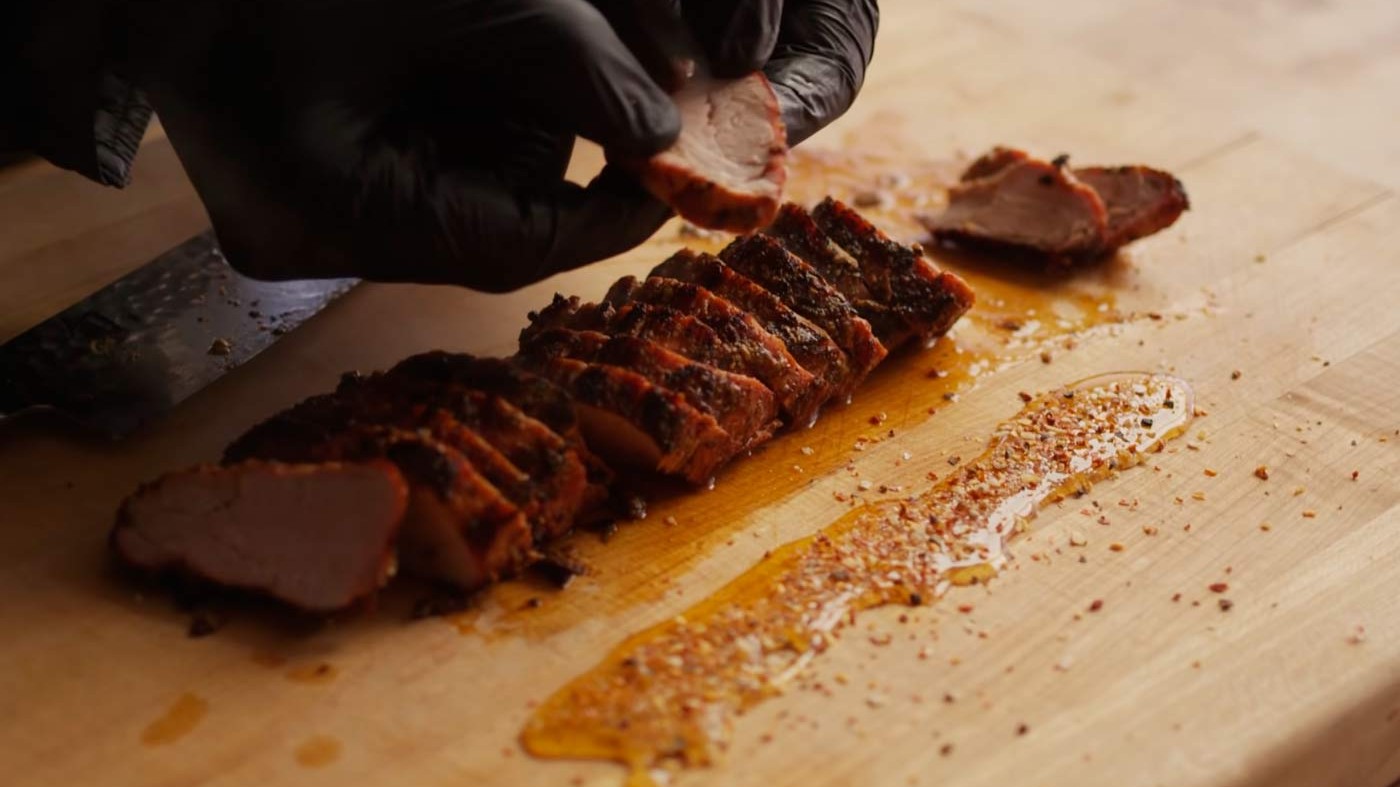
- A board dip built right where you slice: Laying honey and seasoning directly on the cutting board next to the sliced tenderloin turns the resting board into the serving station, so every slice picks up extra flavor as you dip it.
Quick Roasted Pork Tenderloin
Eric Gephart
Rated 2.7 stars by 32 users
Category
Entree
Cuisine
American
Servings
8
Prep Time
20 minutes
Cook Time
12 minutes
Calories
129
Chef Eric Gephart fires up the Kamado Joe Classic III Ceramic Charcoal Grill for a Quick Roasted Pork Tenderloin recipe!
Ingredients
- 2 pork tenderloins
-
1 tbsp Cattleman’s Grill Steakhouse Seasoning
-
1 tbsp Cattleman’s Grill California Tri-Tip Seasoning
-
2 tbsp Kozlik’s Dijon Classique Mustard
- 2 tsp garlic, chopped
- 2 sprigs fresh rosemary, chopped
- 2 sprigs fresh thyme leaves
- 2 leaves fresh sage
-
2 tsp extra virgin olive oil
-
3 tbsp Reida Farm Kansas Wildflower Honey
-
1 tbsp Cattleman’s Grill California Tri-Tip Seasoning
For the Quick Marinade:
For the Board Dipping Sauce:
Directions
- Stabilize your Kamado Joe Classic III Ceramic Charcoal grill at 450ºF - 500ºF. Bank your coals to one side of the grill and top with a grill grate at the lowest setting of the divide and conquer system. On the other side, place a deflector shield and top with a grill grate at the highest setting creating a 2 zone system.
- Trim any visible silver skin from the surface of the tenderloin. Season the tenderloin with the Cattleman’s Grill Steakhouse Seasoning and the Cattleman’s Grill California Tri-Tip Seasoning.
- Combine the ingredients for the quick marinade in a bowl to create the herb garlic mustard paint. Paint the mixture evenly on the tenderloin.
- Season the lower grill grate with a touch of oil and place the quick marinated tenderloins on the grill grate. Sear evenly and continue to dry baste with seasoning as needed. Once you like the bark, graduate it to the indirect side. Paint with another layer of the mustard paint. Close the dome and cook for a few more minutes then flip and cook until your reach an internal temp of 140ºF - 145F.
Once you have reached the correct internal temperature (145ºF), remove the tenderloin to a cutting board and allow to rest for 8 to 10 minutes.
- Slice down the loin across the grain. Lay down a line of Raw Honey and top with seasoning for dipping. Enjoy!
Recipe Note
Recipe FAQ
Why set up a two-zone fire instead of cooking over one heat level the whole time?
Banking coals to one side lets you sear the tenderloin directly over high heat first, then move it to the indirect side to finish gently — one grill, two cooking methods, without ever changing the setup.
Why season the tenderloin with two different rubs and a mustard-herb paint?
Layering steakhouse seasoning under California Tri-Tip seasoning, then coating the surface in a chopped herb-and-mustard paste, builds more complexity than any single seasoning could deliver on its own.
Why paint on a second layer of the mustard mixture after searing?
Adding a second coat once the tenderloin moves to indirect heat lets that layer set gently instead of burning off during the high-heat sear on the direct side.
Why rest the tenderloin for 8-10 minutes before slicing?
Resting lets the juices redistribute through the meat, so slicing doesn't send them running out onto the cutting board.
What internal temperature should the pork tenderloin actually reach?
Step 4 lists a range of 140-145°F, but step 5 correctly calls out 145°F as the actual target — and 145°F is exactly the USDA minimum for whole-muscle pork. Cook to at least 145°F rather than pulling early at the low end of that range.
Why slice the tenderloin across the grain instead of with it?
Cutting across the grain shortens the muscle fibers in each slice, making the meat easier to chew instead of leaving long, tough strands running through every piece.
Why put the honey and seasoning directly on the cutting board instead of serving them in a separate bowl?
Laying them right next to the sliced tenderloin turns the board itself into the serving station — each slice picks up honey and seasoning as you dip it, with no extra dish needed.
How indoor-friendly is this recipe?
4 out of 5 — a hot cast iron skillet finished in the oven can replicate the sear-then-roast method just as well as the two-zone grill; the kamado mainly adds a touch of char.
Recipe Highlights
Two-zone sear-and-finish: One fire handles both searing and gentle finishing.
Double rub plus herb paint: Layers three seasoning elements for more complexity.
Re-painted mustard coat: Sets gently on indirect heat instead of burning off.
Board dipping sauce: Turns the cutting board itself into the serving station.
Recommended Recipes
Nutrition
Nutrition
- Nutrition Serving Size
- 4.05 oz
- per serving
- Calories
- 129
- Carbs
- grams
- Protein
- 20 grams
- Fat
- 3 grams
- Sodium
- 70 milligrams


